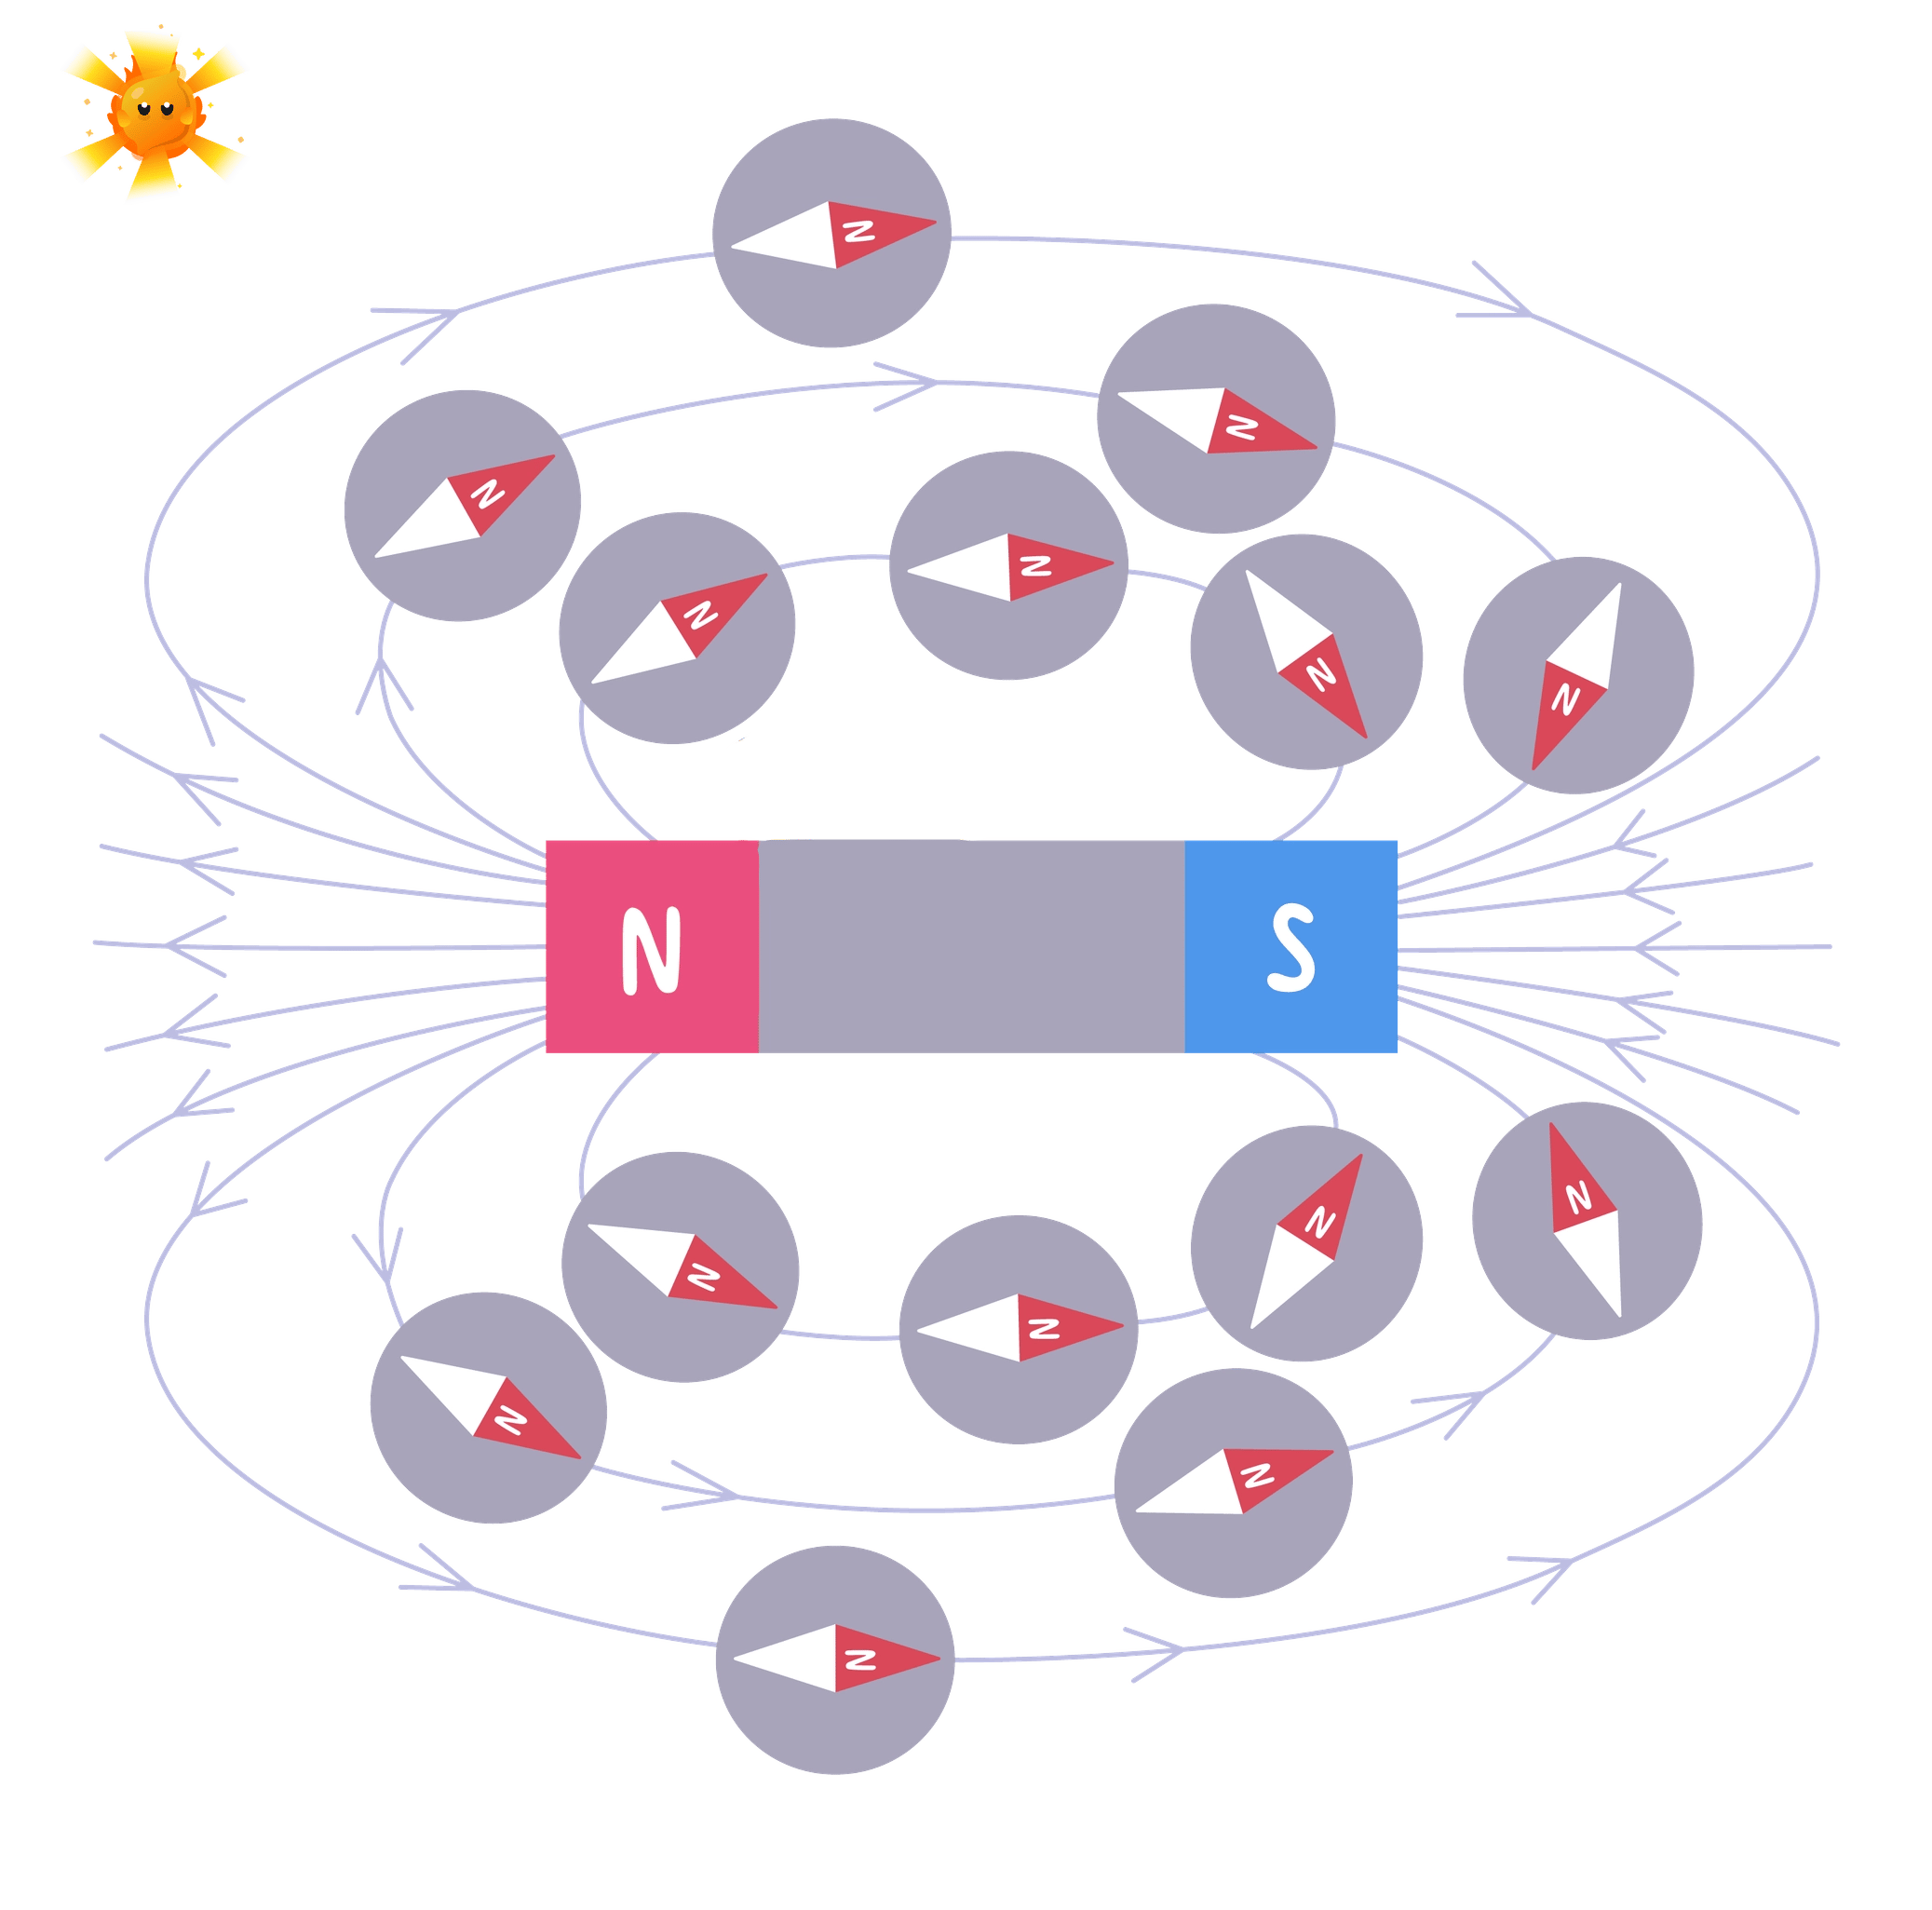
A plotting compass traces a field line one short step at a time
- A plotting compass is a small pivoted magnet, so it always settles along the field line passing through it.
- The needle only reveals the direction at the one point where it sits, so a whole line has to be built up by moving the compass in short steps.
- Marking pencil dots at the two ends of the needle, then moving the compass so that it starts where the last dot was, keeps each step short enough for the curve to come out accurate.
- Working on plain paper on a wooden bench matters, because iron and steel nearby become induced magnets and bend the field you are trying to record.
Practical
Investigation: plotting the magnetic field around a bar magnet
- Aim: to plot the field lines around a bar magnet, and around two magnets facing pole to pole, and to mark the direction of the field.
- Apparatus: eye protection, one or two bar magnets, a plotting compass, a shaker of iron filings, plain paper, a sharp pencil and a sheet of thin card.
- Method:
- Lay the paper on a wooden bench well away from other magnets and from the steel frame of the bench, put the bar magnet in the middle and draw round it, labelling which end is N.
- Place the plotting compass just off the N pole and mark a pencil dot at each end of the needle.
- Move the compass along so that its tail sits exactly on the dot the head made, then mark a new dot at the head.
- Keep stepping the compass along in this way until you reach the S pole or the edge of the paper.
- Join the dots into one smooth curve and add an arrowhead pointing away from the N pole.
- Start again from a different point around the magnet and repeat until six to eight lines cover the pattern on both sides.
- For the iron-filings version, cover the magnet with the card, sprinkle filings thinly over the card and tap it gently so they settle into the pattern.
- Repeat both methods with two magnets a few centimetres apart, once with N facing N and once with N facing S.
- Measure and plot: no numerical readings are taken, so the record is a set of sketched patterns with arrows: one bar magnet, two like poles, and two unlike poles.
- Result: the lines run from N to S outside the magnet and are closest together at the poles; unlike poles give lines that link the two magnets, while like poles give lines pushed apart with a neutral point midway where the compass will not settle.
- Watch out:
- Iron filings show the shape only, because a filing has no arrowhead, so use the compass to add the directions.
- Sprinkle the filings thinly, since a heavy dose clumps together and blurs the pattern.
- Keep other magnets, iron objects and the steel bench frame away, because they distort the field you are trying to map.
- Re-plot any line that comes out kinked, and repeat each line to check that it lands in the same place.
- Safety: wear eye protection while handling iron filings, and sprinkle them onto the card rather than straight onto the magnet, because filings are almost impossible to clean off a magnet.
Iron filings show the shape fast, a compass gives the direction
- Each iron filing becomes an induced magnet in the field, so the filings line up end to end and reveal the whole pattern in one go.
- The trade-off is that a filing has two identical ends: it lies along the line but cannot show which way the field points.
- A compass is slower because it maps one point at a time, but its N-seeking end gives the direction of the field directly.
- The usual approach is to use filings for the shape and then place a compass on the pattern to add the arrowheads.
- The filings also make the field strength visible, because they crowd together near the poles where the field is strongest.
Permanent magnets are chosen when the magnetism must stay on
- A fridge magnet and a magnetic cupboard catch hold on with no power supply at all.
- A compass needle is a light steel magnet on a low-friction pivot, free to turn to the Earth's field.
- Loudspeakers and headphones hold a permanent magnet next to a coil, and the changing current in the coil pushes against that fixed field to drive the cone in and out.
- Small d.c. motors, such as the one in a cordless drill, use permanent magnets to provide the field that the current-carrying coil turns in.
- Magnetic door seals on a fridge and the catch that holds a laptop lid shut work the same way, quietly and with no wiring.
Electromagnets are chosen when the magnetism must be switched
- An electromagnet is a coil of insulated wire wound on a soft-iron core, and it is magnetic only while a current flows.
- A scrapyard crane picks up a car body and drops it into the crusher simply by breaking the circuit.
- A relay uses a small current through an electromagnet to close a switch carrying a much larger current, which is how turning a car ignition key operates the heavy starter motor safely.
- A circuit breaker in a consumer unit contains an electromagnet that snaps the switch open the instant the current becomes too large.
- Electric bells, magnetic locks on secure doors, and the separators that pull steel cans out of a recycling stream all depend on being able to switch the field off.
- The strength of an electromagnet can also be changed by altering the current or the number of turns on the coil, which is impossible with a permanent magnet.
Common Mistake
- Iron filings on their own do not give the direction of the field, so a plot made with filings alone cannot earn the direction mark.
- Do not draw the field lines as straight spokes radiating from the magnet, because outside a bar magnet they curve round from N to S.
- An electromagnet is not simply a stronger magnet: the property being used is that its magnetism switches off with the current.
Exam technique
- When describing the compass method, give the sequence in order: draw round the magnet, mark both ends of the needle, move the compass to the last dot, repeat, then join the dots and add an arrow.
- Say that the plotting is done away from other magnets and iron objects, because that precaution is usually worth a mark on its own.
- For a "uses" question, pair each use with its reason, as in "a scrapyard crane, because the magnetism can be switched off to release the load".
- Watch the wording: a question about an electromagnet wants a soft-iron core and a current, while one about a permanent magnet wants steel and no power supply.
Self review
- Describe how a plotting compass is used to plot one magnetic field line.
- Why do iron filings show the shape of a field but not its direction?
- Why should the plotting be done away from other magnets and iron objects?
- Give two uses of a permanent magnet and two of an electromagnet.
- State two ways of making an electromagnet stronger.
